We often forget to take photos of antiques that we work on in our excitement. This time, we remembered to photograph the process and are so proud to share it with you. We were almost as ecstatic as the customer when we showed them the big reveal!
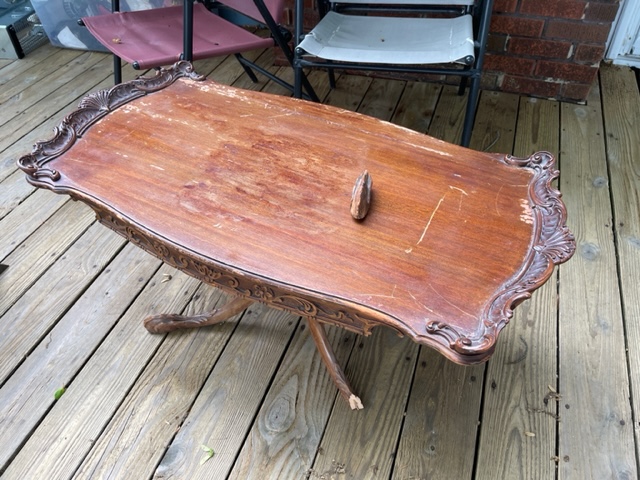
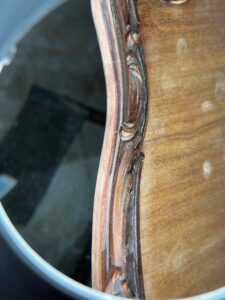
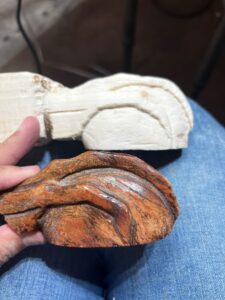
This is how it used to look. It had a glass top which was removed before the photo but as you can see there is water damage which appears to have ruined the varnish. On older pieces, if the varnish is ruined then there is very little we can do to restore it if water leak thru the varnish. Other than restoring it, we were tasked with fixing a broken leg that had come clean off and hand carving a fourth leg that had broken and disappeared.

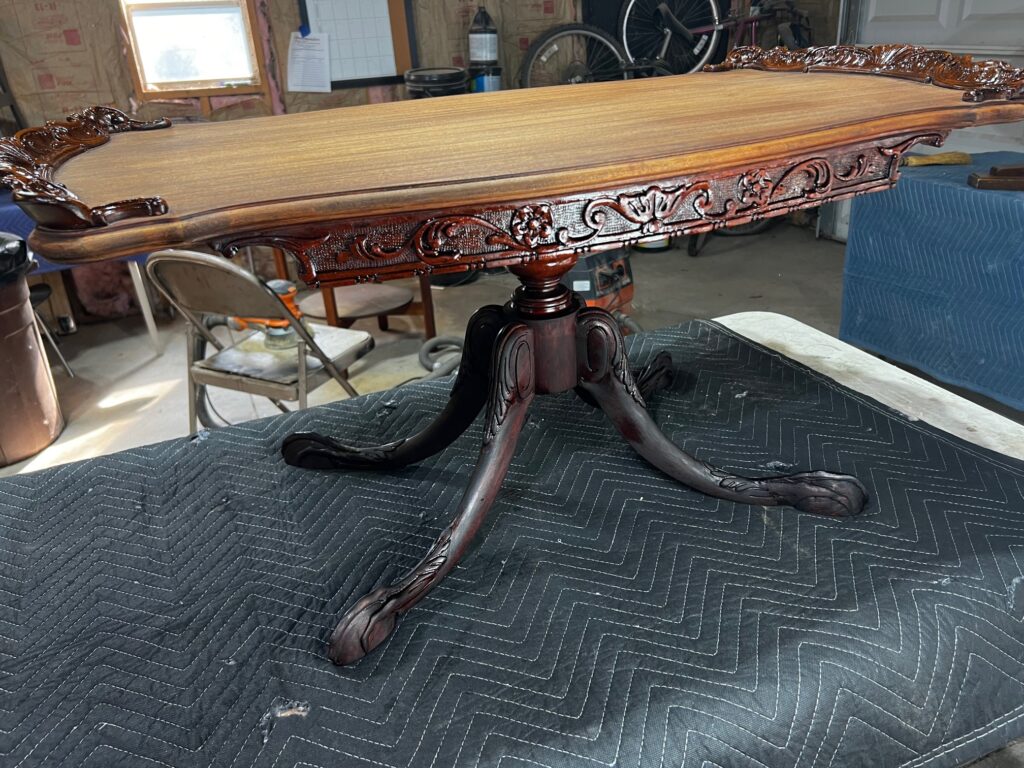
Once in the shop we cleaned it best we could and began very lightly sanding the top of the table by hand.
We had to be delicate since we didn’t know if the varnish was still present and if it was, how much was left. Its important to only sand the varnish and never burn through to the original wood because then you lose the beautiful grain.
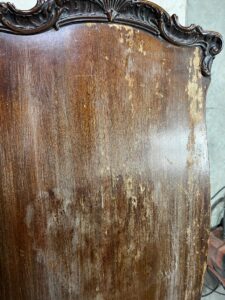
Thankfully, as we hand sanded the top of the table the water stain didn’t ruin it. We could see the beautiful texture of the original wood and the varnish was still intact.
The top layer of varnish is brown, and the underlying wood is the yellowish part you see in the photo. The varnish was very easily sanded away like a fine dust because it was around 150 years old. (We did wear masks).

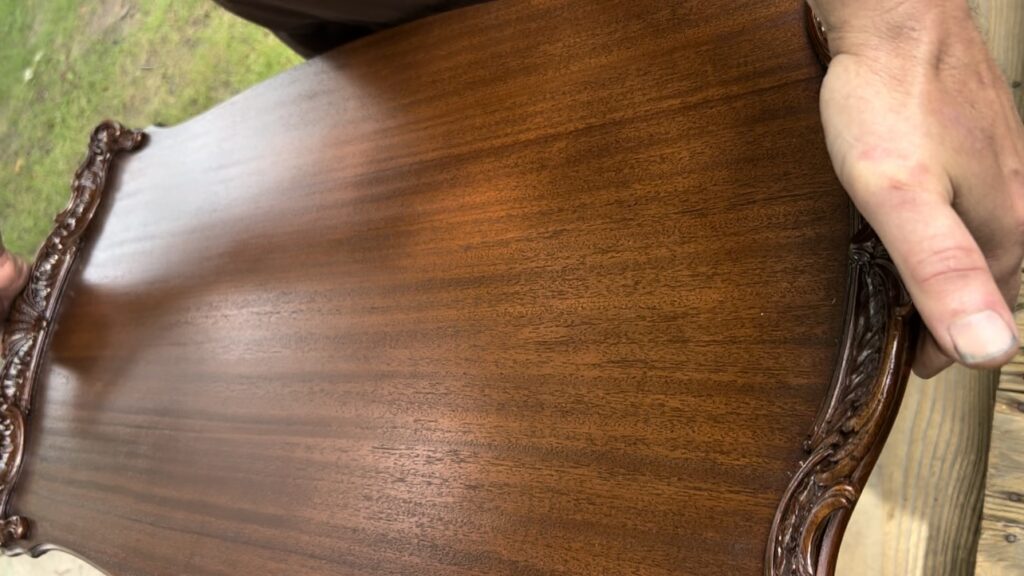
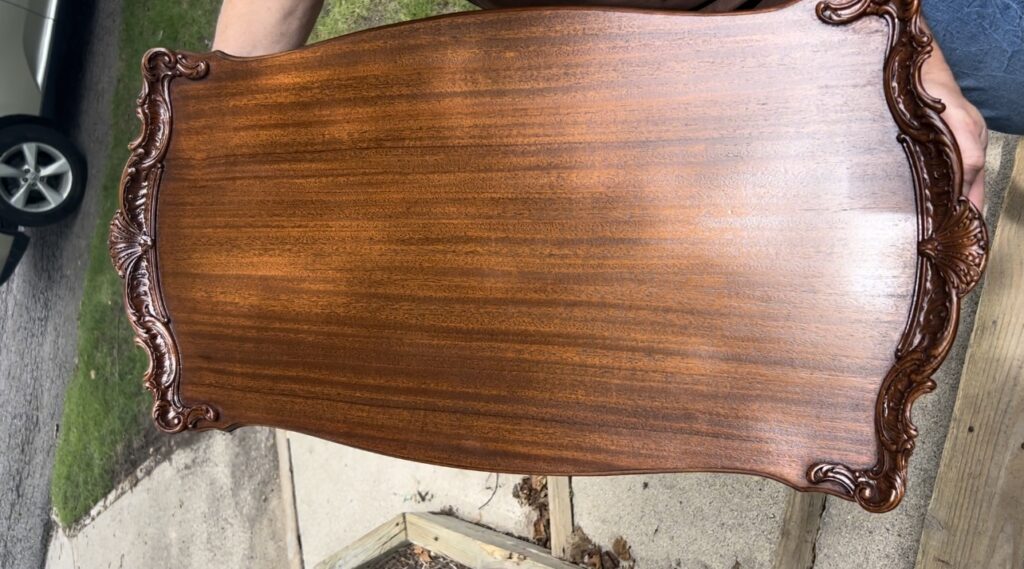
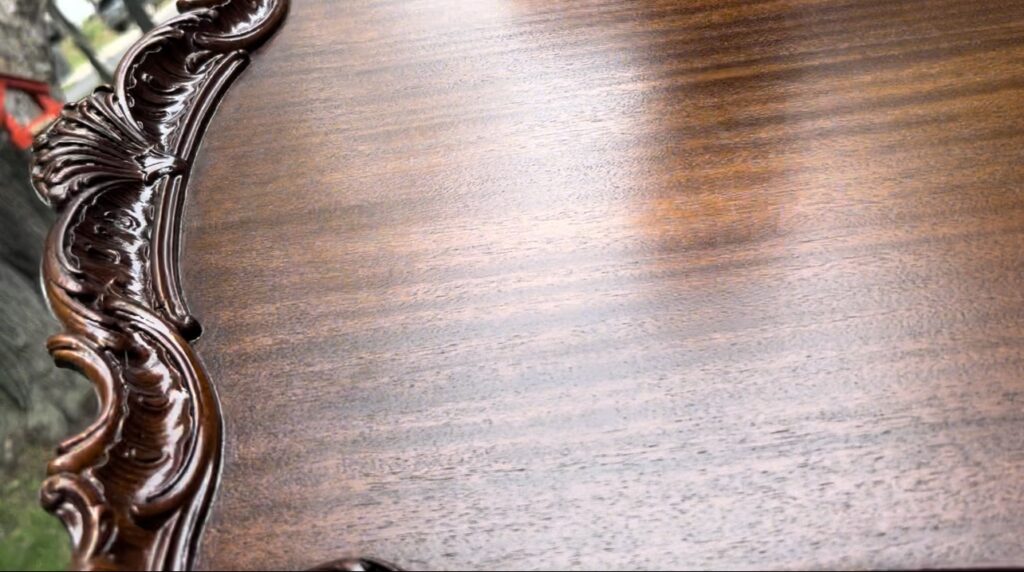
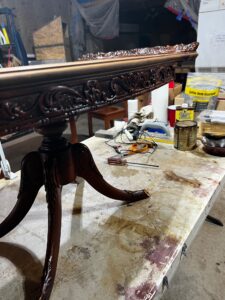
After we finished carving a new foot and attached both feet to the table we began sanding and staining the table. There were so many crevices that dust had accumulated over the last couple centuries, so the process was tedious but so very worth it.
Do you want to challenge yourself? Take a good look at both photos below and see if you can tell which foot was recently hand carved and which are original.
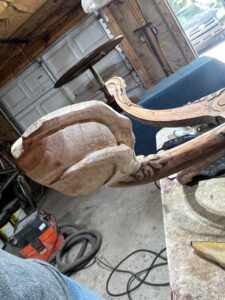
The picture above is dark because we did not finish staining yet. The top hasn’t been stained at all and the bottom still hadn’t gone through an antiquing process where we age it to look like the rest. We lightened the legs after the photo was taken.
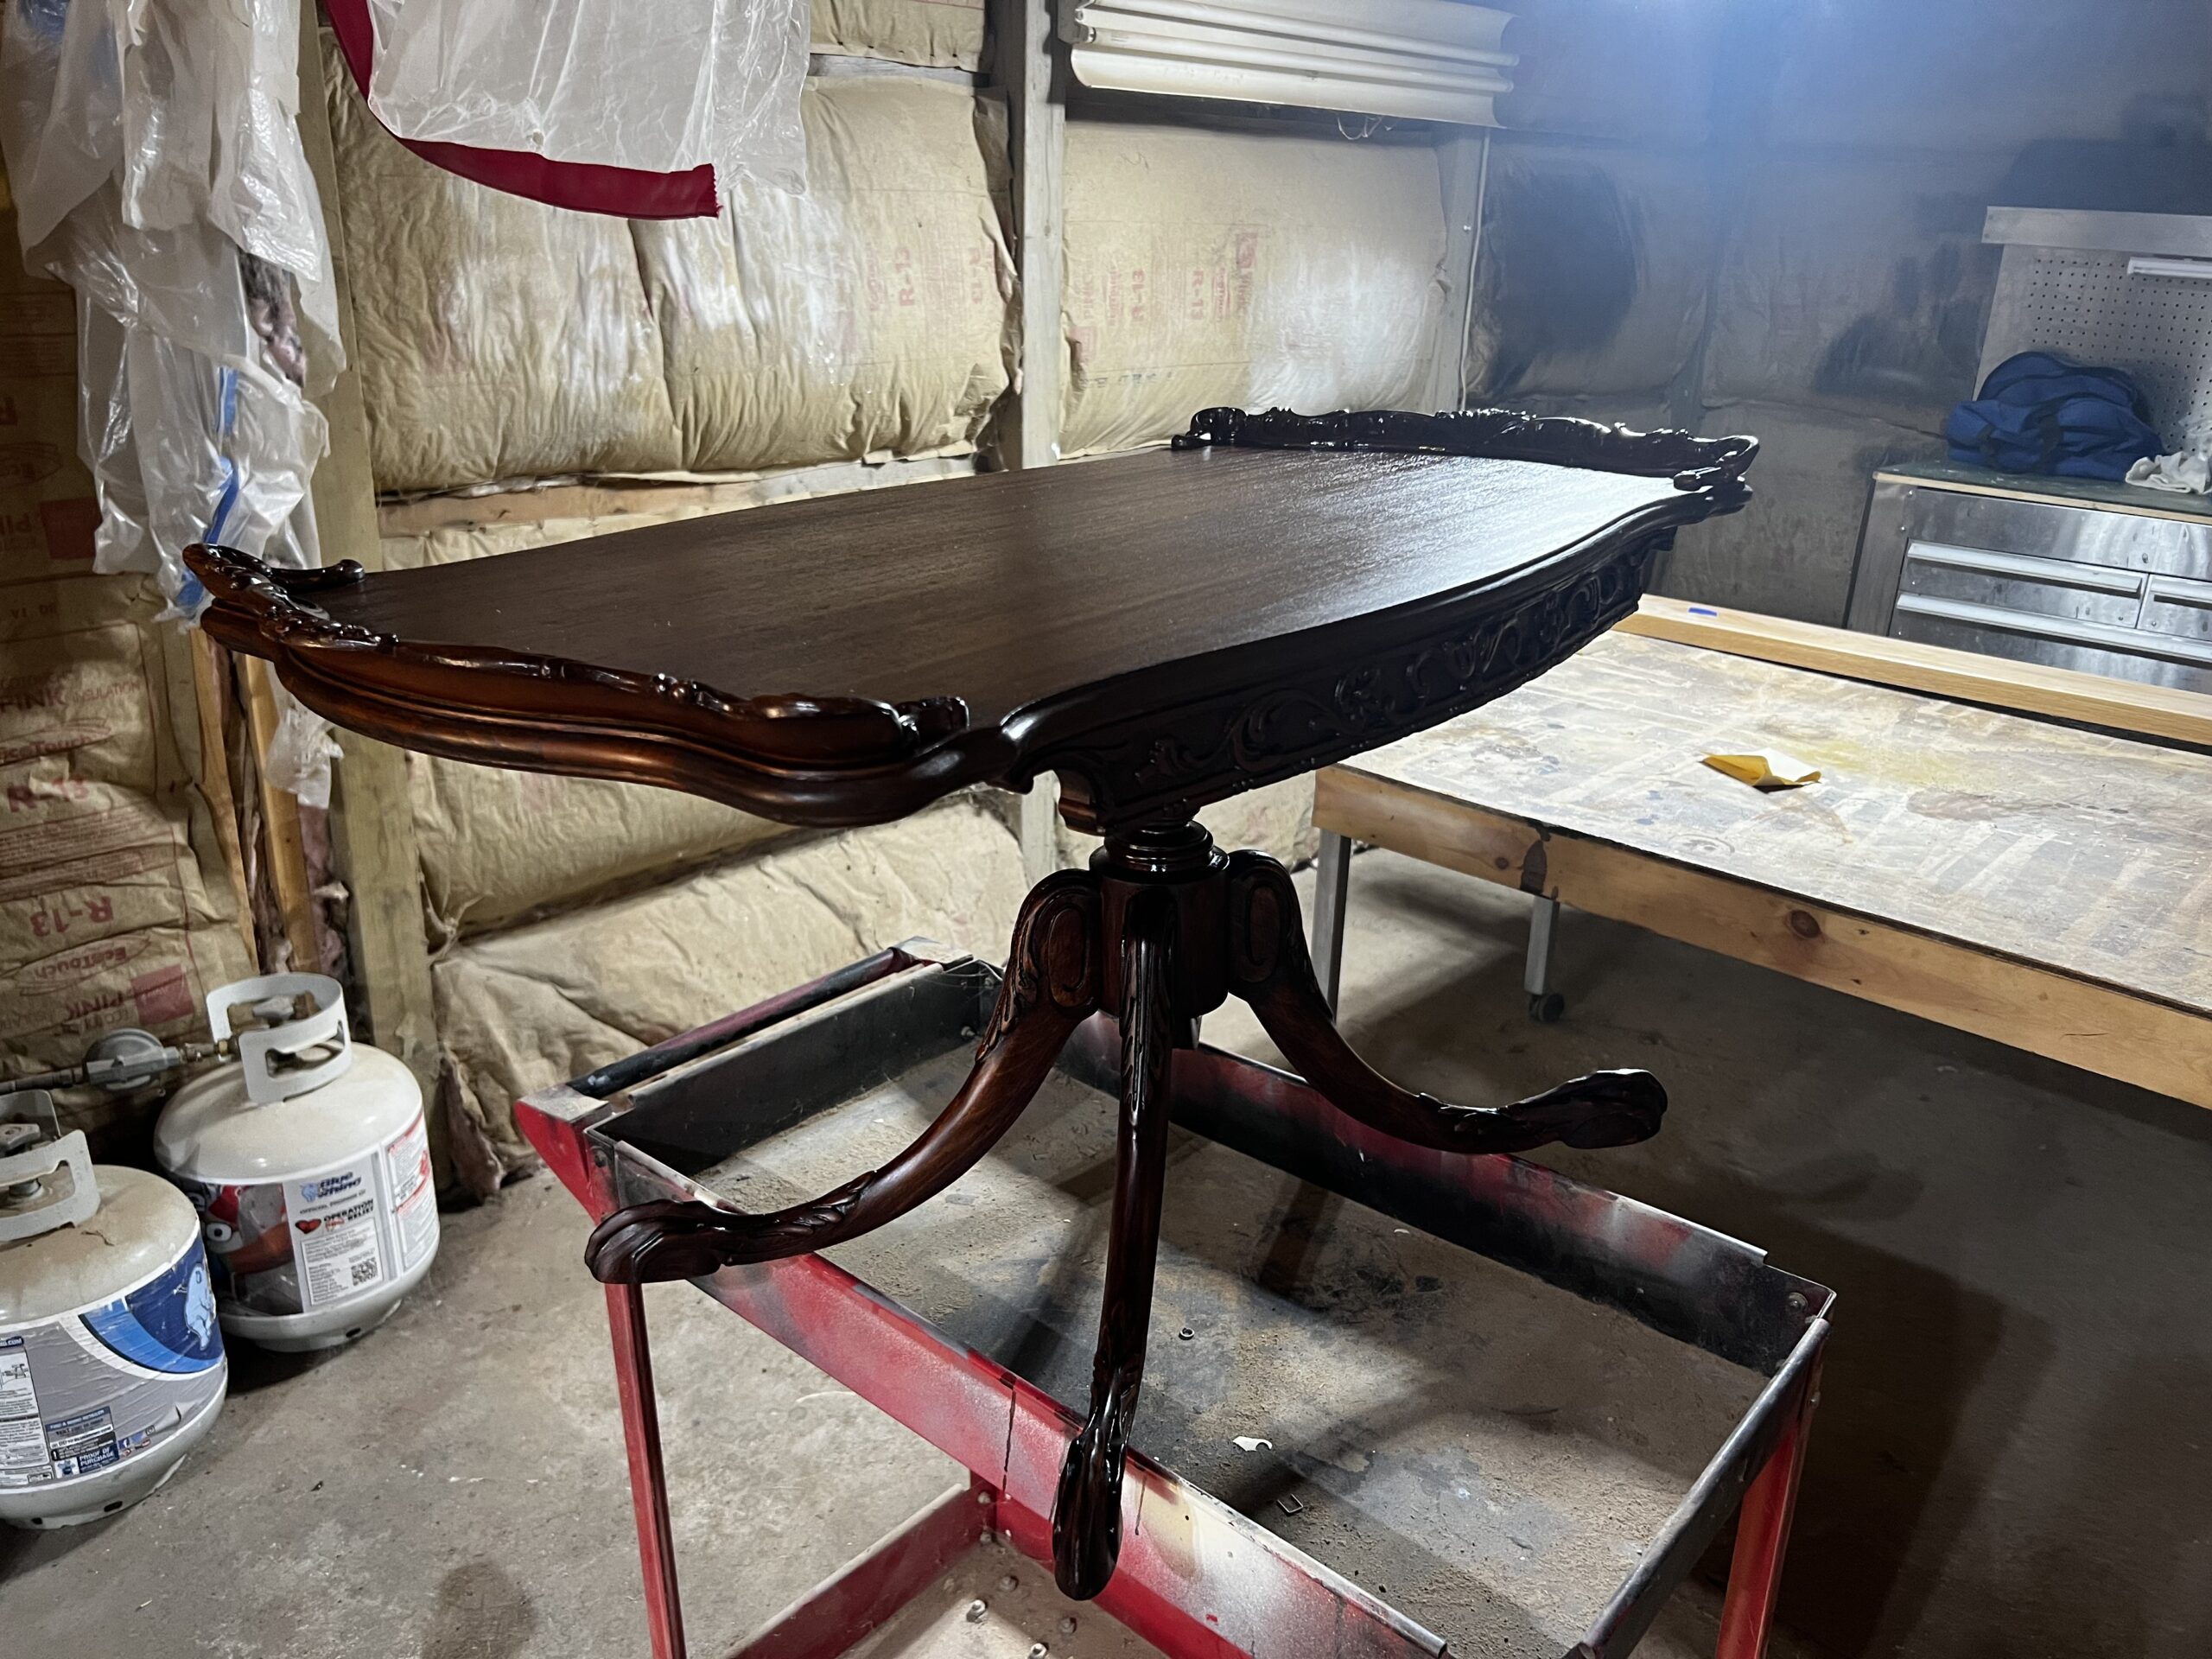
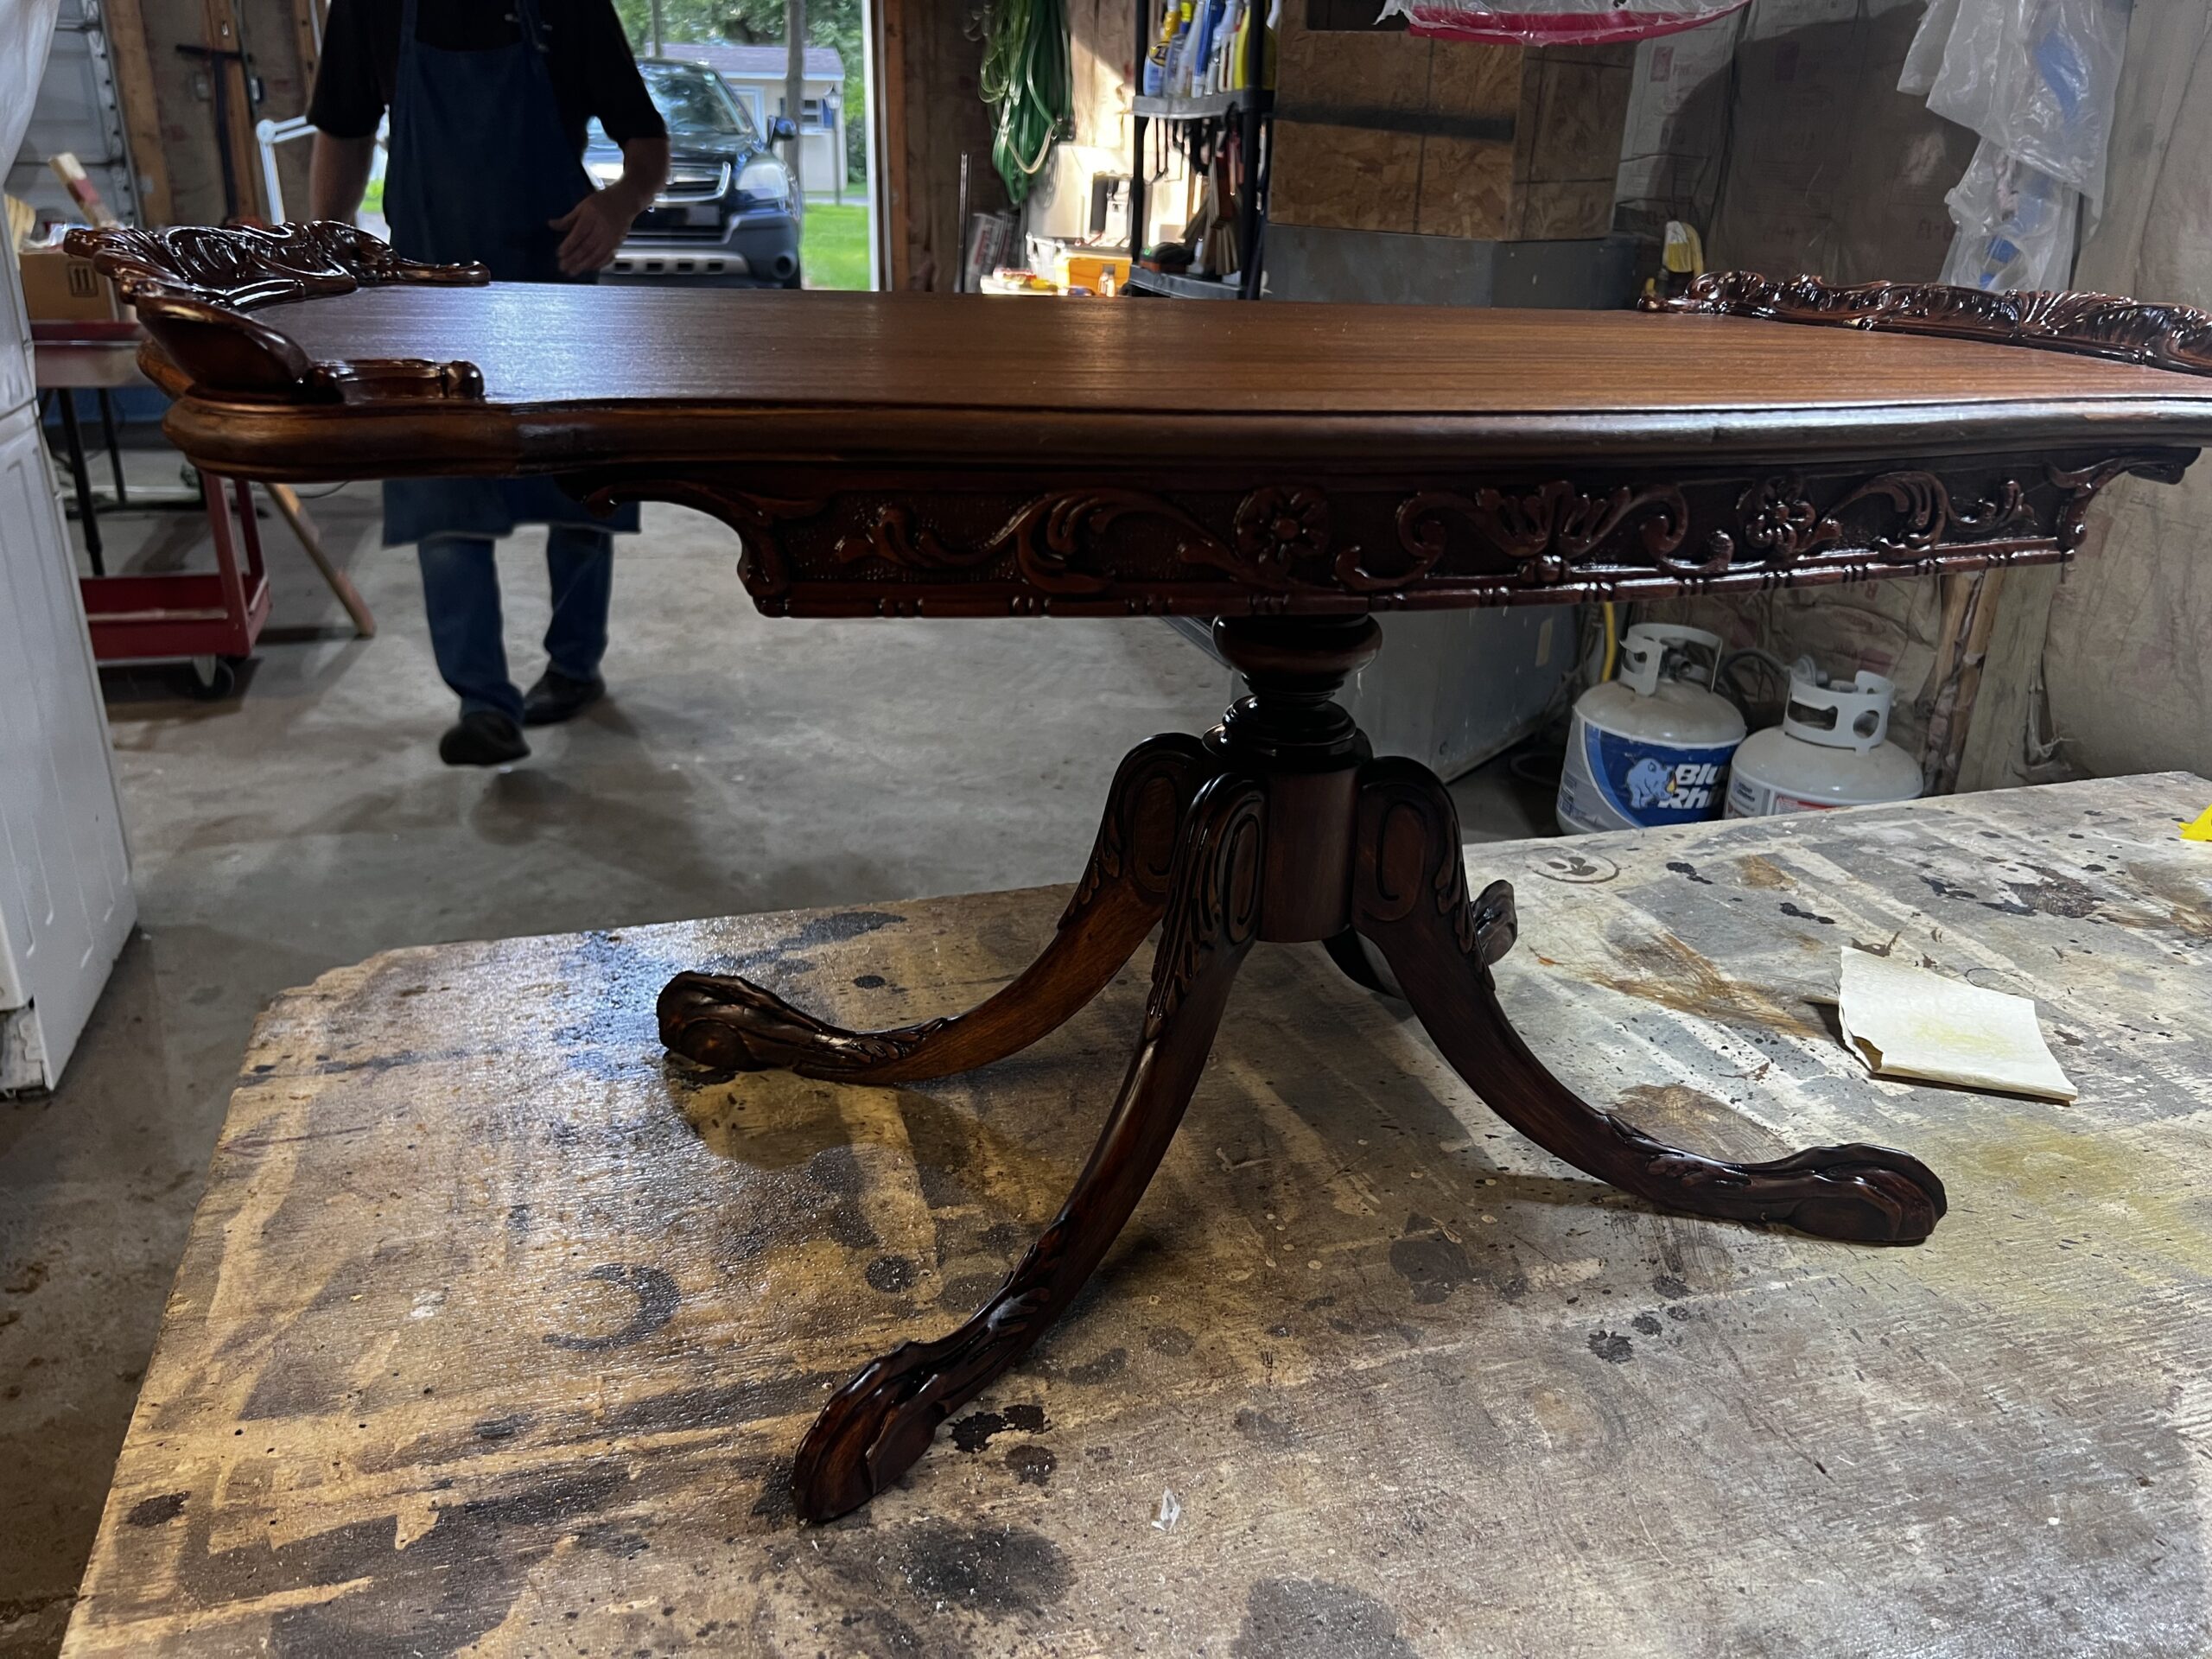
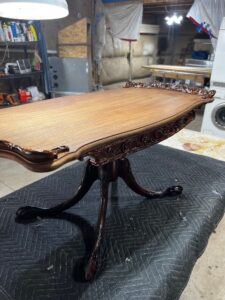
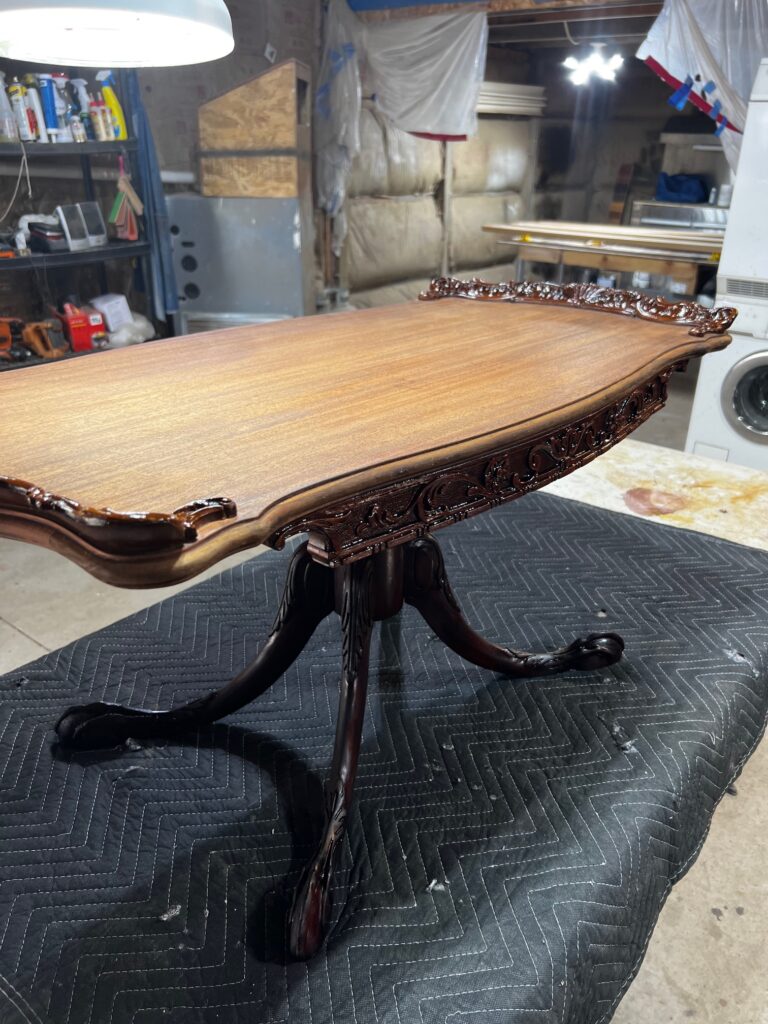
Table is all finished with the stain, just applying final sealer and lacquer so that it can last another 100 years or so. Are you able to find which leg was hand carved recently?
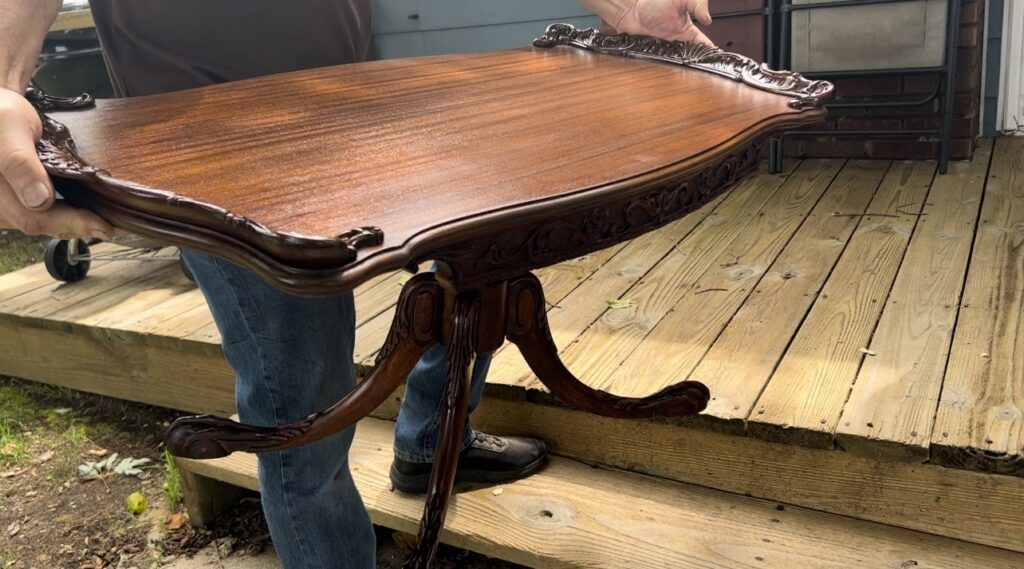
Are you ready for the final photos?
Here they are!
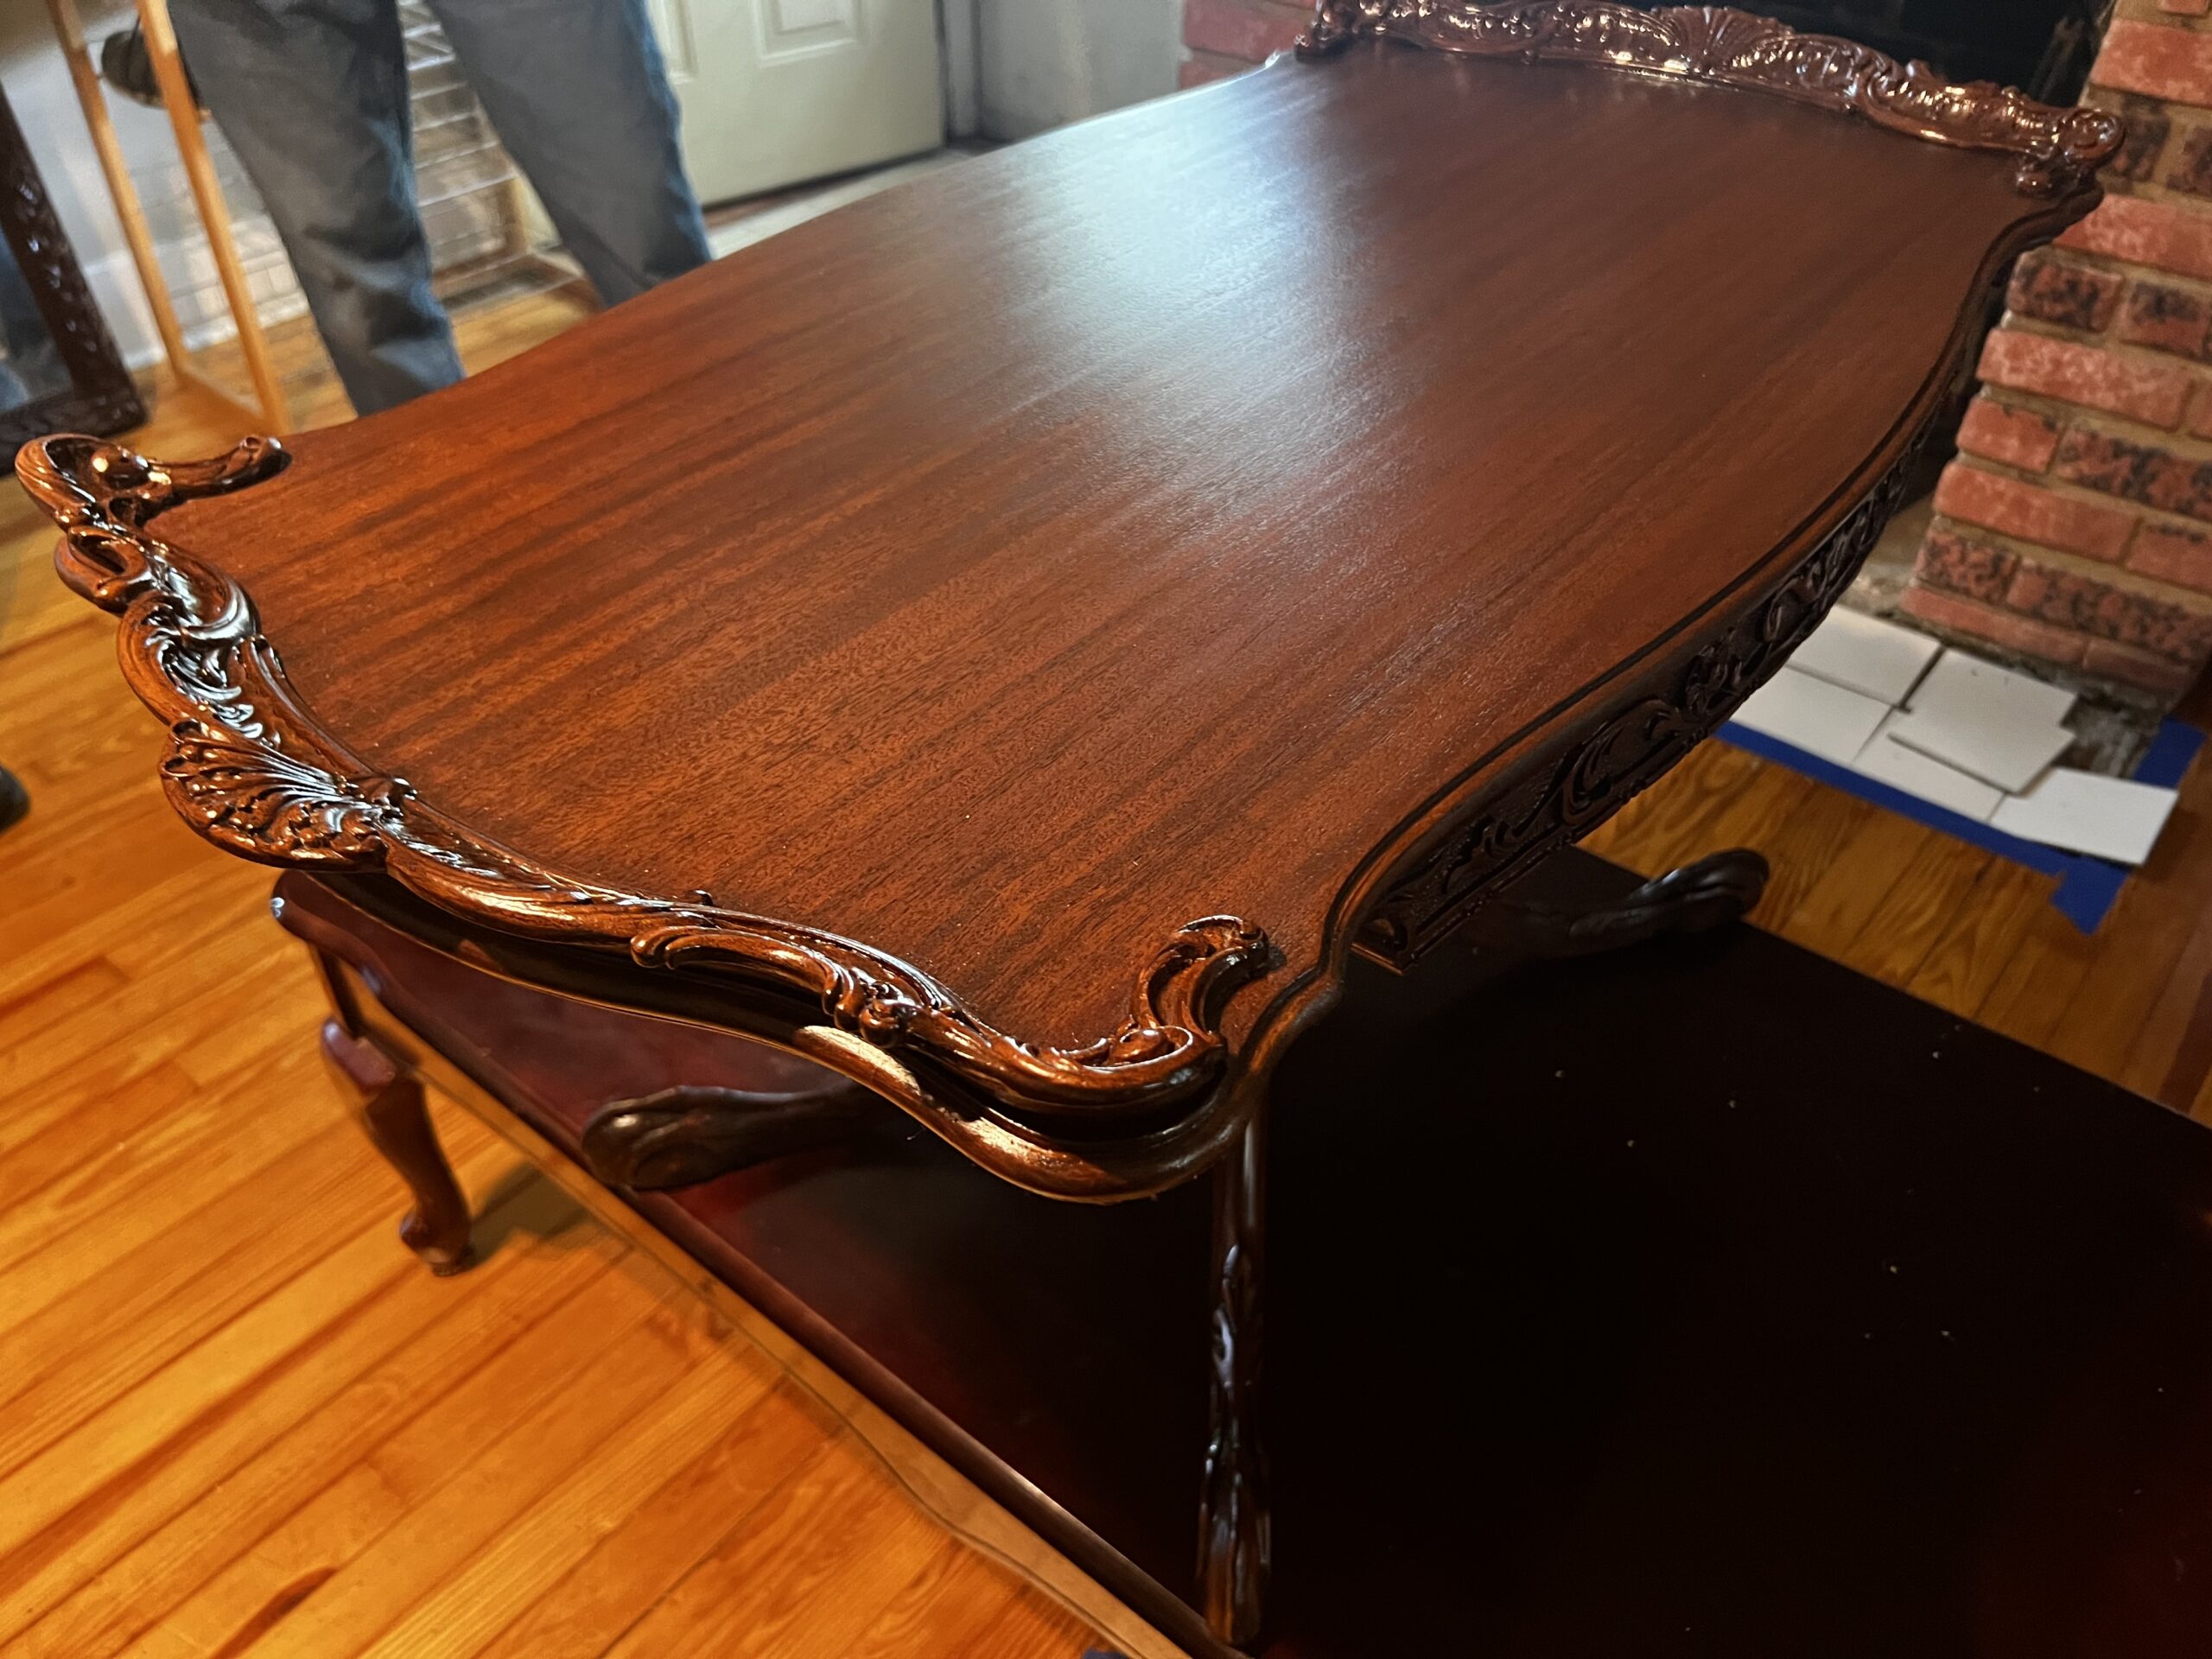
Waiting to be picked up from the client. The grain of this wood is just stunning. We were able to clean away all the dirt from the little crevices of every intricately carved piece of this remarkable table.